Table of Contents
ToggleA retaining wall can be the difference between a flat, boring patio and a dynamic outdoor living space with depth, dimension, and purpose. Whether you’re looking to prevent soil erosion, create tiered planting beds, or add architectural interest to your yard, patio retaining wall ideas offer both practical benefits and aesthetic appeal. In 2026, homeowners are moving beyond standard concrete blocks to explore creative materials, integrated landscaping, and designs that blend durability with visual impact. This guide walks you through proven retaining wall options, from classic stone to modern composites, helping you choose the right solution for your property and skill level.
Key Takeaways
- Patio retaining wall ideas combine practical erosion control and soil retention with aesthetic appeal, transforming flat yards into dynamic, multi-level outdoor living spaces.
- Proper drainage is critical to retaining wall longevity—use 4–6 inches of landscape fabric and perforated drainage pipe behind the wall to prevent water buildup, frost heave, and structural failure.
- Natural stone and interlocking concrete blocks offer durability and visual warmth, while composite and recycled materials provide budget-friendly, low-maintenance alternatives that install faster and require less specialized labor.
- Tilt retaining walls slightly backward (1–2 inches per foot of height) so gravity and soil pressure work in your favor, and check local building codes as walls taller than 4 feet typically require permits and licensed contractors.
- Integrate landscaping thoughtfully by planting trailing vines and groundcovers to soften wall edges, align the wall with existing hardscape and sightlines, and limit your material palette to two complementary colors for a cohesive design.
- Walls taller than 3 feet or in wet zones benefit from a French drain at the base, which prevents water pooling and extends the wall’s structural integrity for decades.
Why Add a Retaining Wall to Your Patio
A retaining wall isn’t just decorative, it solves real problems. It holds back soil on slopes, preventing erosion and protecting the integrity of your patio foundation. It also creates level or terraced spaces, giving you more usable area for seating, dining, or planting. Beyond function, a well-designed retaining wall adds character and property value.
Retaining walls handle lateral pressure from soil and water, so they’re engineered structures, not just stacked blocks. Walls taller than 4 feet typically require a building permit and often a licensed contractor to ensure proper drainage, compaction, and structural stability. Check your local codes, they vary significantly by jurisdiction. For shorter walls (under 4 feet) on level ground with light soil loads, a determined DIYer can tackle the project with careful planning and solid prep work. Either way, understanding your wall’s height, soil conditions, and drainage needs is non-negotiable. Poor drainage is the #1 killer of retaining walls: water pressure builds behind the wall, and winter freeze-thaw cycles accelerate failure.
Stone and Brick Retaining Walls
Natural Stone for Timeless Appeal
Natural stone, granite, slate, limestone, or fieldstone, offers unmatched durability and visual warmth. Stacked dry (without mortar) or set with mortar, stone adapts to virtually any landscape style. Dry-stacked stone is more forgiving: each piece can shift slightly, accommodating ground settling without cracking. Mortared stone is more rigid and weather-resistant but requires skilled labor to level courses and maintain consistent joints.
Gather these materials: individual stones (sorted by size), a level, a deadblow mallet, landscape fabric, drainage gravel (typically 4 inches behind the wall), and a cold chisel for trimming. For mortared walls, add Type N mortar (standard for outdoor applications, 1 part cement to 3 parts sand) or Type S for high-stress applications.
Install the wall in 1-2 foot lifts. Compact the base, lay landscape fabric, add gravel, then place and level each stone. Tilt stones slightly back (1-2 inches per foot of height) so gravity and soil pressure work in your favor, not against you. For a 3-foot wall, that’s a 3-4 inch set-back, enough to make a difference. Ensure proper drainage behind the wall: stagnant water causes frost heave and structural failure.
Decorative Brick and Block Options
Concrete retaining wall blocks, often called versa-lok blocks or similar interlocking systems, offer speed, uniformity, and predictability. These pre-cast units stack easily, align without mortar, and can handle modest heights (2-4 feet for DIY). Colors range from earth tones to contemporary grays. Some blocks include geogrid pockets, which accept plastic reinforcement to stiffen the wall on slopes or taller runs.
Alternatively, decorative brick units (often engineered for retaining applications) bring warmth and a finished look. They’re softer than blocks, so they’re best for shorter walls or as a facade over a block core. Brick expands and contracts with temperature: plan for small gaps in long runs.
For a simple 18-36 inch retaining wall, gather: blocks or bricks, a level, a rubber mallet, geogrid (if slope exceeds 3:1), landscape fabric, and 3-4 inches of compacted gravel base. Stack and tap each unit level. Backfill with drainage material and compacted soil in 6-8 inch lifts. The beauty here is speed, a small wall can be standing in a weekend, though curing and final landscaping add time. Link to comprehensive retaining wall design guidance for deeper technical details on material selection and placement.
Modern and Budget-Friendly Materials
Composite and Recycled Materials
Composite retaining wall panels, made from recycled plastic and wood fiber, are gaining traction among eco-conscious DIYers. They don’t rot, splinter, or require staining. Cost runs slightly higher than wood but lower than stone, and installation is straightforward: post-and-panel systems, often 8-12 feet long and 12-24 inches tall, slot together without mortar or heavy lifting.
Check weight before ordering: composites are heavier than wood but lighter than stone, so two people can manage most panels. Plan for posts every 4-6 feet driven into compacted gravel base. Panels slot in, and you’re done. No painting, no maintenance, though some materials will fade slightly in UV light, which is cosmetic, not structural.
Recycled tire walls and sleeper tie walls (using treated landscape timbers) are cheaper still. Reclaimed railroad ties, even though romantic appeal, are often contaminated with creosote (toxic to soil and groundwater): modern alternatives like composite “ties” avoid that issue. Stacked and deadened with spikes or brackets, these systems work for 1-2 foot heights on stable, level ground.
Wood (if you go that route) requires annual inspection: look for rot at the base where water pools. Untreated wood fails in 5-10 years in wet climates: pressure-treated extends that to 15-20 years, though some homeowners prefer avoiding chemical treatment near gardens.
For a 4-foot composite panel wall 20 feet long, expect: 6-8 panels, posts, fasteners, and drainage gravel. Cost runs $600-1,500 depending on material quality, compared to $1,500-3,500 for mortared stone. Labor is the real savings, composite installs in a day: stone takes a week. Explore resources like Better Homes & Gardens for seasonal patio projects and material comparisons that align with your budget and timeline.
Landscaping Integration and Design Tips
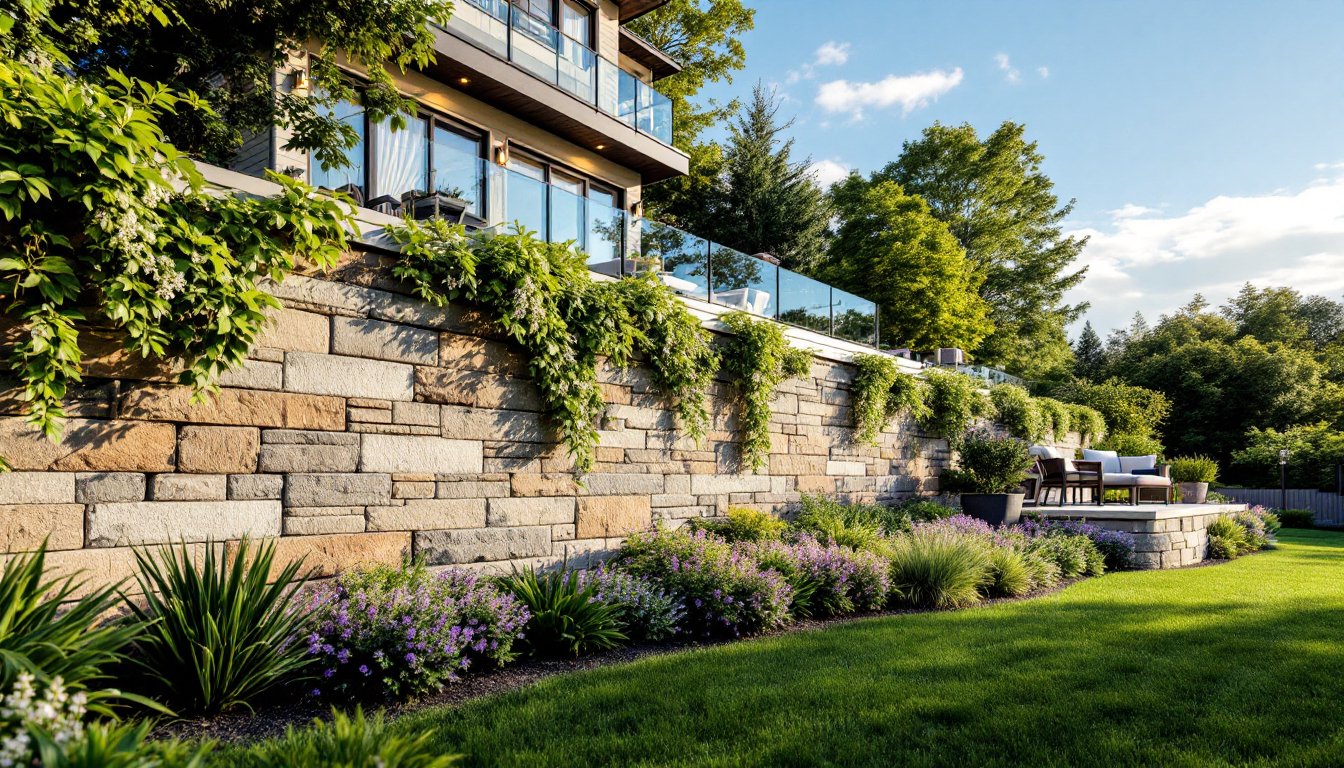
A retaining wall without thoughtful landscaping looks like a fortress. Plant trailing vines, flowering shrubs, or cascading perennials at the top and base to soften edges and tie the wall into the landscape. Place low-growing groundcovers or sedums between stones: they’ll root into small gaps and add texture without overwhelming the structure.
Consider sight lines from your patio or house. A wall running perpendicular to the view breaks the yard into zones and feels intentional. Walls running parallel to a deck or seating area tend to feel like a barrier: offset them slightly or incorporate planting breaks to soften that effect. Lighting, small uplights or path lights at the wall base, transforms a daytime element into an evening focal point without adding cost.
Combine your wall height with adjacent planting levels. A 2-foot wall topped with a 3-foot shrub creates visual interest: a wall taller than surrounding plants can feel top-heavy. Vary plantings: tall and narrow, medium mounding, trailing, and ground-hugging. This creates depth and flow. A monotone wall (all one color stone) reads cleaner than mismatched materials: if mixing materials, limit yourself to two complementary types.
Drainage cannot be overstated. Lay 4-6 inches of landscape fabric behind the wall, top it with perforated pipe (if the wall exceeds 3 feet or sits in a wet zone), then backfill with compacted drainage rock. This wick water away from the wall base, preventing rot, frost heave, and foundation failure. Install a French drain at the wall base if water consistently pools on the uphill side, it’s not a luxury, it’s insurance.
For color and cohesion, limit your palette to two stone colors or a single block finish, then let plantings provide accent. Integrate your wall into existing hardscape, align it with deck corners, pathway edges, or patio steps so it feels like part of a larger plan, not an afterthought. Consult home improvement guides that showcase before-and-afters: studying finished projects reveals how proportion, material choice, and planting timing influence the final result. A poorly conceived wall, no matter how well-built, looks cramped: a thoughtfully integrated wall elevates the entire outdoor space.